So we created a Target, and setup the LUN on the QNAP. Now we need to setup an Oracle Linux system to use the new LUN.
First , lett’s install the iscsi initiator utilities.
sudo dnf -y install iscsi-initiator-utils
Next up, we can discover the available LUNs on the targets. Since I have two targets, I’ll run the same discovery against both targets;
iscsiadm -m discovery -t sendtargets -p 192.168.210.10
iscsiadm -m discovery -t sendtargets -p 192.168.210.11
Now we can login to the array. Since we didn’t setup CHAP, no passwords are needed. If we setup CHAP, edit /etc/iscsi/iscsid.conf and fill out the user name and password in the node.session.auth.username and node.session.auth.password fields.
Also, if you want to limit a LUN to a specific initiator, you can find the hosts’s initiator in the file /etc/iscsi/initiatorname.iscsi
Now let’s login cia iSCSI so we can mount the devices.
iscsiadm -m node –login
We also want the loginto happen on reboot, so let’s set it to automatic.
iscsiadm -m node -L automatic
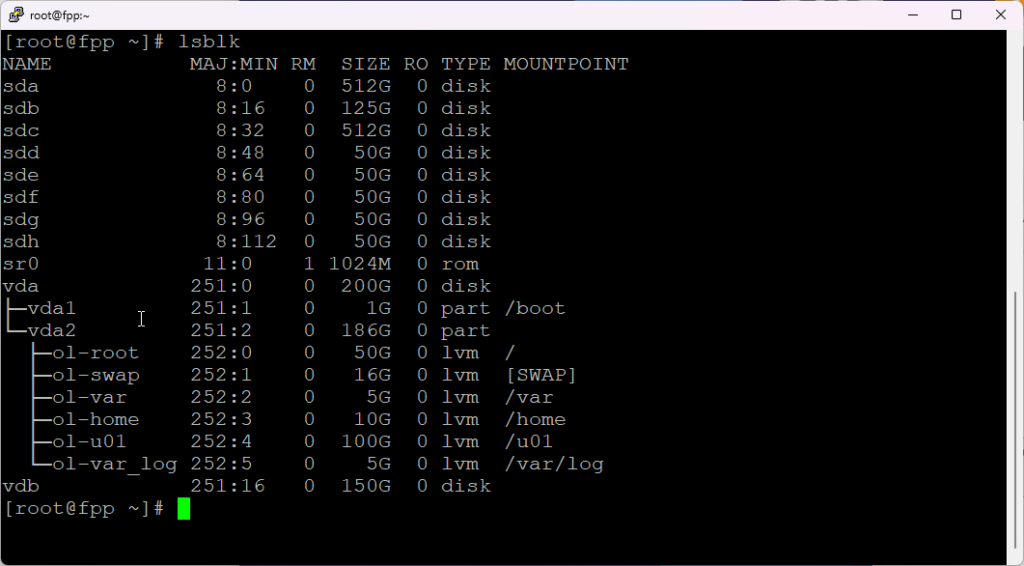
Now, if we look at the block devices, we should see some new LUNs.
lsblk

So the device is /dev/sdb. Now the easy way is I know it’s th e only 125GB LUN, but I can also check by looking at the LUN number.
I can see all the details for each target and it’s LUNs. First I need to know what session;
iscsiadm -m session

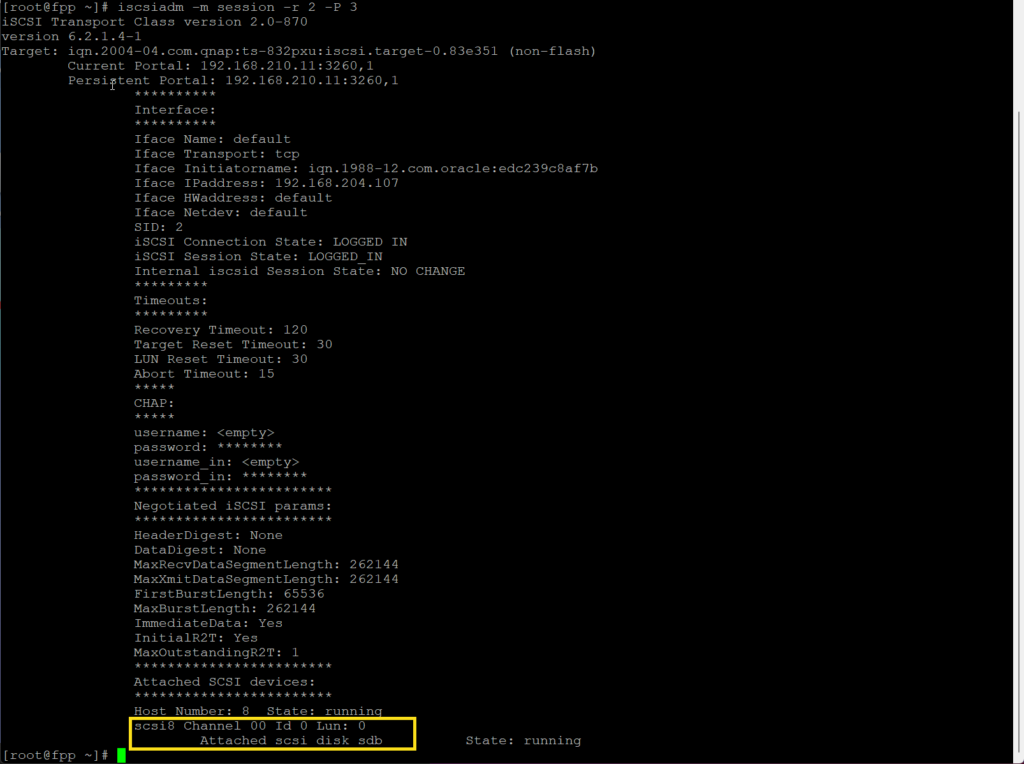
Here, I see connections for both targets. Session [2] maps to the target-0 IQN that the new LUN is on. SO now, lets look at just connections on that target. We will pass -r #, using 2 ase the #, for session 2. The -P 3 will show the printlevel, a number from 0-3.
iscsiadm -m session -P 3 -r 2

So looking ta this, LUN0 on this target is /dev/sdb.
When we look at the WNAP we see LUN0 on that target is the 125GB LUN we created.

In a production environment, you might also have the Storage array setup specific masks, so that all initiators can’t see all LUNs, but for my lab this works well. Just be careful to now use a disk another system is using.
Now that we know the device, we can use it like any disk!
Lets put a GPT label on it;
parted –script /dev/sdb “mklabel gpt”
Now , a partition;
parted –script /dev/sdb “mkpart primary 0% 100%”
Time for format it using zfs;
mkfs.xfs /dev/sdb1
Make a place to mount it;
mkdir /mnt/tmp
Ans manually mount the filesystem!
mount /dev/sdb1 /mnt/tmp
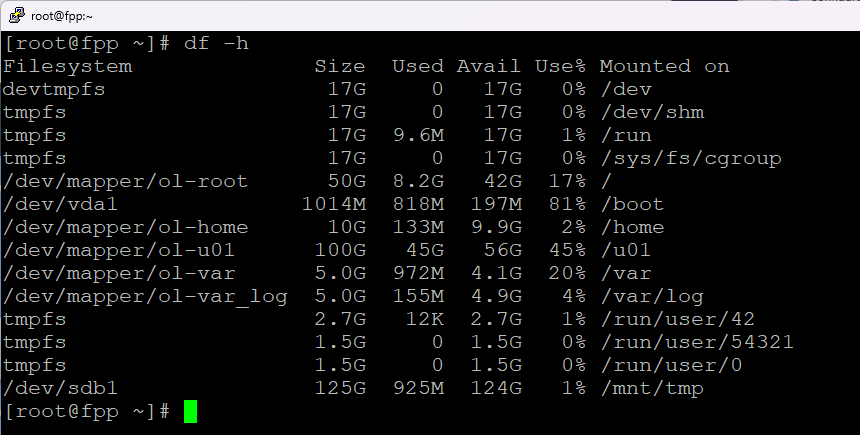
We can now see it mounted, looking at df -h
