Here we are, a freshly patched Solaris 11.2 server, and nothing to do with it. Let’s go ahead and put Database 12c on the system. This will give us a great sandbox to experiment with new Database features, like V$KERNEL_IO_OUTLIER views and the new Optimized Shared Memory method of managing database memory.
Before we can install Database 12c on the VM, we need to make a few changes. In my vbox environment I have a separate network where I run an OEM 12c server and a DNS server that happen to be clones from the Technology Innovation Center. I also will need to add some disk space, using new virtual disks, and put this into a new ZFS pool.
First, we need to add a new NIC to outr database server. This is mainly for my lab environment, where I want to connect it to an existing Oracle Enterprise Manager 12c system. We will also need this new NIC to have a static IP, instead of a DHCP based IP address.
The first step is to shutdown the Solaris 11.2 server. This is done using the shutdown command;
root@Solaris112:~# shutdown -y -g0 -i0
Shutdown started. Wednesday, November 26, 2014 08:10:07 PM UTC
Changing to init state 0 - please wait
Broadcast Message from root (pts/1) on Solaris112 Wed Nov 26 20:10:07...
THE SYSTEM Solaris112 IS BEING SHUT DOWN NOW ! ! !
Log off now or risk your files being damaged
root@Solaris112:~#
After a few minutes, the VM should be off, and look like this in Virtualbox.
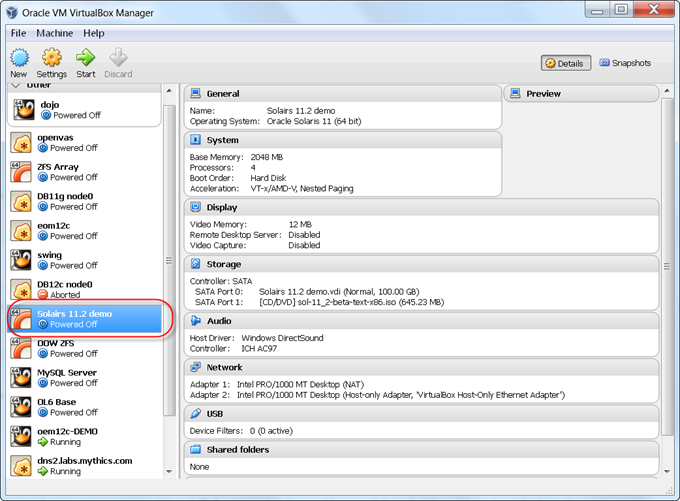
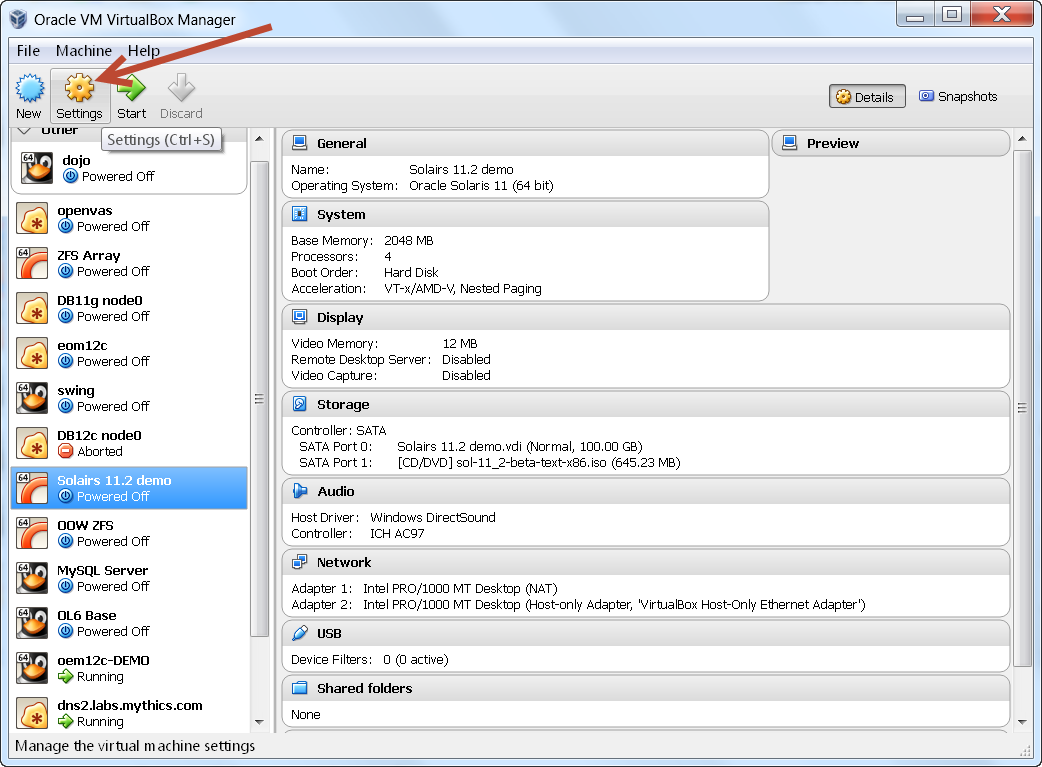
We now need to add a new interface. Select the VM, and click on the settings button.
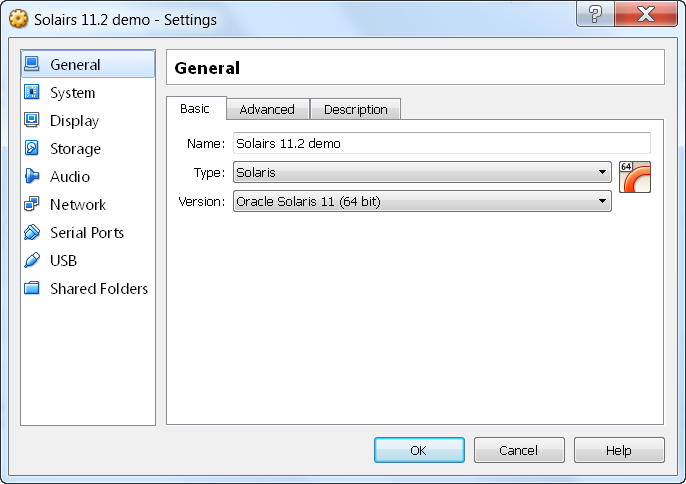
You should now have the general settings box.
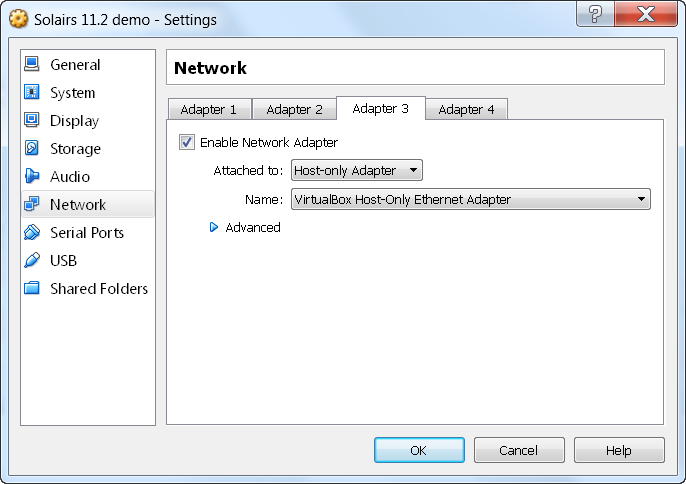
Select the Network option, and select the third adapter. On the demo VM, we used the first slot for a NAT address, and the second slot for a host only that uses DHCP. We will use the third adapter for the Host-Only apaptert that is used for the same network that the OEM servers is on. This
Click, OK, and then start the VM back up.
Once we are back online, we need to IP the new interface. Log back into the system , and su to root.
Now run an ifconfig –a
root@Solaris112:~# ifconfig -a
lo0: flags=2001000849<UP,LOOPBACK,RUNNING,MULTICAST,IPv4,VIRTUAL> mtu 8232 index 1
inet 127.0.0.1 netmask ff000000
net0: flags=100001004843<UP,BROADCAST,RUNNING,MULTICAST,DHCP,IPv4,PHYSRUNNING> mtu 1500 index 2
inet 10.0.2.15 netmask ffffff00 broadcast 10.0.2.255
ether 8:0:27:7c:ba:2d
net1: flags=100001004843<UP,BROADCAST,RUNNING,MULTICAST,DHCP,IPv4,PHYSRUNNING> mtu 1500 index 3
inet 192.168.56.101 netmask ffffff00 broadcast 192.168.56.255
ether 8:0:27:83:95:cb
net2: flags=100001004843<UP,BROADCAST,RUNNING,MULTICAST,DHCP,IPv4,PHYSRUNNING> mtu 1500 index 4
inet 192.168.56.103 netmask ffffff00 broadcast 192.168.56.255
ether 8:0:27:d1:3f:90
lo0: flags=2002000849<UP,LOOPBACK,RUNNING,MULTICAST,IPv6,VIRTUAL> mtu 8252 index 1
inet6 ::1/128
net0: flags=120002004841<UP,RUNNING,MULTICAST,DHCP,IPv6,PHYSRUNNING> mtu 1500 index 2
inet6 fe80::a00:27ff:fe7c:ba2d/10
ether 8:0:27:7c:ba:2d
net1: flags=120002004841<UP,RUNNING,MULTICAST,DHCP,IPv6,PHYSRUNNING> mtu 1500 index 3
inet6 fe80::a00:27ff:fe83:95cb/10
ether 8:0:27:83:95:cb
net2: flags=120002004841<UP,RUNNING,MULTICAST,DHCP,IPv6,PHYSRUNNING> mtu 1500 index 4
inet6 fe80::a00:27ff:fed1:3f90/10
ether 8:0:27:d1:3f:90
We now see a net2 interface for both IPV4 and IPV6, and we can verify this by looking at the ether (MAC) address 8:0:27:d1:3f:90. Looking in the virtualbox configuration we see the same address. Often leading zeros are added so 8:0:27:d1:3f:90 becomes 08:00:27:d1:3f:90, or 080027d13f90.
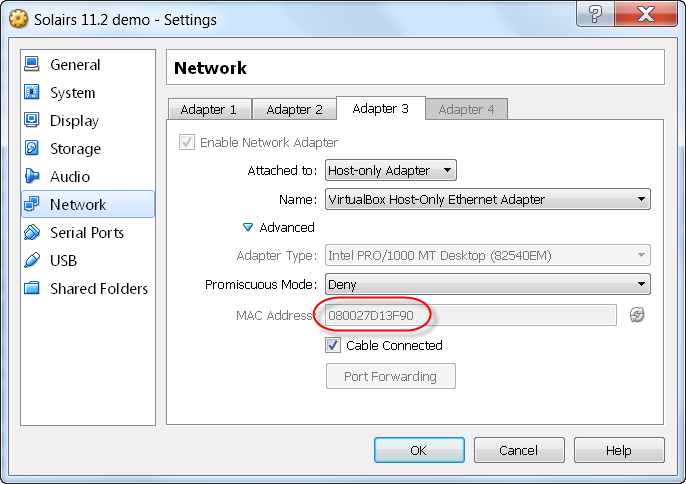
You will see that the IPV4 interface DHCPed an IP of 192.168.56.103. We need to reIP that interface to the OEM network. In Solaris 11, the network is no longer defined by the /etc/hostname.$INTERFACE files, it uses a new method. As a Solaris admin, we no longer use flat files to build the configuration. We should use the dladm and ipadm commands going forward. Unlike the ifconfig command, changes made using dladm and ipadm are persistent across reboots.
We will reIP the interface to 172.20.2.55 and update the netmask, all in a single command! We will call the new IP “lab”
root@Solaris112:~# ipadm create-addr -T static -a 172.20.2.55/22 net2/lab
Now let’s check, by using the ipadm command to show all the IP addresses.
root@Solaris112:~# ipadm show-addr
ADDROBJ TYPE STATE ADDR
lo0/v4 static ok 127.0.0.1/8
net0/v4 dhcp ok 10.0.2.15/24
net1/v4 dhcp ok 192.168.56.101/24
net2/v4 dhcp ok 192.168.56.103/24
net2/lab static ok 172.20.2.55/22
lo0/v6 static ok ::1/128
net0/v6 addrconf ok fe80::a00:27ff:fe7c:ba2d/10
net1/v6 addrconf ok fe80::a00:27ff:fe83:95cb/10
net2/v6 addrconf ok fe80::a00:27ff:fed1:3f90/10
Let’s do some cleanup, and remove the net2/v4 address.
root@Solaris112:~# ipadm delete-addr net2/v4
And no we can verify this.
root@Solaris112:~# ipadm show-addr
ADDROBJ TYPE STATE ADDR
lo0/v4 static ok 127.0.0.1/8
net0/v4 dhcp ok 10.0.2.15/24
net1/v4 dhcp ok 192.168.56.101/24
net2/lab static ok 172.20.2.55/22
lo0/v6 static ok ::1/128
net0/v6 addrconf ok fe80::a00:27ff:fe7c:ba2d/10
net1/v6 addrconf ok fe80::a00:27ff:fe83:95cb/10
net2/v6 addrconf ok fe80::a00:27ff:fed1:3f90/10w verify this
We also need to update DNS to use my internal DNS. Just like the interface information. DNS is no longer managed by modifying flat files. All DNS information is stored in the SMF ( Service Management Facility) . The SMF is managed using the svccfg command. DNS entries are stored in the svc:/network/dns/client
First, lets update the DNS search o use labs.mythics.com, multiple search entries can be added, simple put the second domains in ” ”
root@Solaris112:~# svccfg -s svc:/network/dns/client setprop config/search='(“labs.mythics.com” )’
multiple search entries can be added, simple put the second domains in ” “, ex.
svccfg -s svc:/network/dns/client setprop config/search='(“labs.mythics.com” “talesfromthedatacenter.com” “xyzzy.net” )’
Now lets verify the change we made.
root@Solaris112:~# svccfg -s svc:/network/dns/client listprop config/search
config/search astring labs.mythics.com
Now set the DNS server
root@Solaris112:~# svccfg -s svc:/network/dns/client setprop config/nameserver=net_address: '(172.20.2.50)'
as with setting the name, we can ad din multiple DNS servers, simply space delimit the multe servers like this;
svccfg -s svc:/network/dns/client setprop config/nameserver=net_address: ‘(172.20.2.50 172.20.2.0 192.168.1.10)’
Now we can verify the new settings;
root@Solaris112:~# svccfg -s svc:/network/dns/client listprop config/nameserver
config/nameserver net_address 172.20.2.50
We also will want to rename this server, from Solaris112 to solaris. This is also stored in the SMF, and is easily changed using the svccfg command.
root@Solaris112:~# svccfg -s system/identity:node setprop config/nodename="solaris"
root@Solaris112:~# svccfg -s system/identity:node setprop config/loopback="solaris"
We now need to refresh the properties and restart the identity service.
root@Solaris112:~# svccfg -s system/identity:node refresh
root@Solaris112:~# svcadm restart system/identity:node
We can verify this using the hostname command;
root@solaris112:~# hostname
solaris
The command prompt will change when we next log into the box.
Next up, zpool 101!