I was talking with a friend recently, and he was looking for a quick and easy way to virtualize a small lab system. We discussed a full out hypervisor and management system like Oracle Linux Virtualization Manager (OLVM and Oracle’s oVirt distribution that give you a web interface, clustering and more) , but he really needed something more lite weight and with less overhead. I suggested just use a basic KVM system, and that went down the path of how to use KVM and why I wrote up these steps!
Before setting up things, my ARM server ( AMD and Intel follows an identical process!) was installed with Oracle Linux 8. I already had it connect for my storage network on 10G Ethernet, with an NFS mount /armvms mounted. I also already had GNOME installed and TigerVNC configured.
KVM is really easy to use, and the included kvm utilities that Oracle Linux has makes this a really easy process. Need a hand setting up VNC? Check out my post here; https://talesfromthedatacenter.com/2022/12/setting-up-vnc-server-on-oracle-linux-8-on-arm-and-x86/
PrepWork
Before you get started, start with Oracle Linux 8 or 9 installed. KVM runs on top of the OS. Also, if you are doing this on a notebook, please disable WIFI. WIFI and advanced networking do not play nicely with each other.
To get started, make sure you have a few repos added to your system. You will need addons, kvm_utiles, latest and likely EPEL. On my lab system I also have appstream. You can check what repos with “dnf repolist”, as seen below;

Next , we need to install a few RPMS.
virt-manager – this is a GUI to build and manage VMs
qemu-kvm – This is the QEMU KVM package that enable the user space components for KVM
libvirt – This is rhe APIs for virtualization
virt-install – Command line interface for building VMs
virt-viewer – give you access to the consoles
virt-top – top like utility for showing VMs
libguestfs-tools – tools to modify VM disk images
tigervnc-server – While not needed peer say, this is how I remotely get a GUI on my systems. You can use any method to get a remote X window, I just prefer VNC.
You can install all of these using the following command;
dnf install -y virt-manager qemu-kvm libvirt virt-install virt-viewer virt-top libguestfs-tools tigervnc-server
When it’s done, and after you have put in the session password you should see a screen like the following;

Networking
Next we need to setup the networking for the KVM VMs. By default the bridge vbr0 is created, but this bridge NATS the VMs. We need a new bridge to allow for each VM to get it’s own IP address.
On the ARM server, I need to create the bridge on interface enP7p2s0, which has the IP address 192.168.204.50/23 and a gateway of 192.168.204.1. DNS being 192.168.200.11 and 192.168.200.41.
The following commands will create a bridge interface called brlab, and then give that bridge the IP information used on the current interface. This needs to be done via the console, as you will loose ssh access to the server while performing these steps.
nmcli connection add type bridge autoconnect yes con-name brlab ifname brlab
nmcli connection modify brlab ipv4.addresses 192.168.204.50/23 gw4 192.168.204.1 ipv4.method manual
nmcli connection modify brlab ipv4.dns 192.168.200.11,192.168.200.41
nmcli connection del enP7p2s0
nmcli connection add type bridge-slave autoconnect yes con-name enP7p2s0 ifname enP7p2s0 master brlab
nmcli connection up brlab
You should now be able to SSH back into the system.
While here, go ahead and copy an install ISO into /var/lib/libvirt/images, this will be used later to install a VM.
Go ahead and reboot the system now.
Building a VM
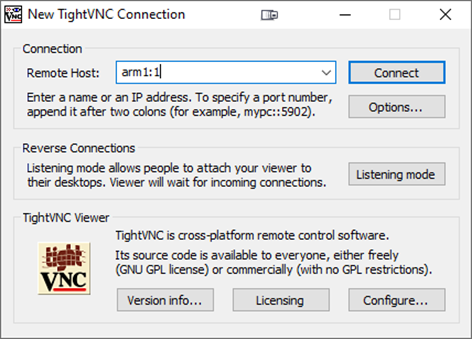
Next, I VNC into the server. On this system VNC is already setup, and running as a system service.
Now I can use TightVNC ( or any other VNC client) to connect to the session.
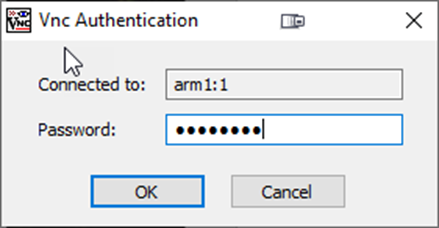
Now, pop in the password…
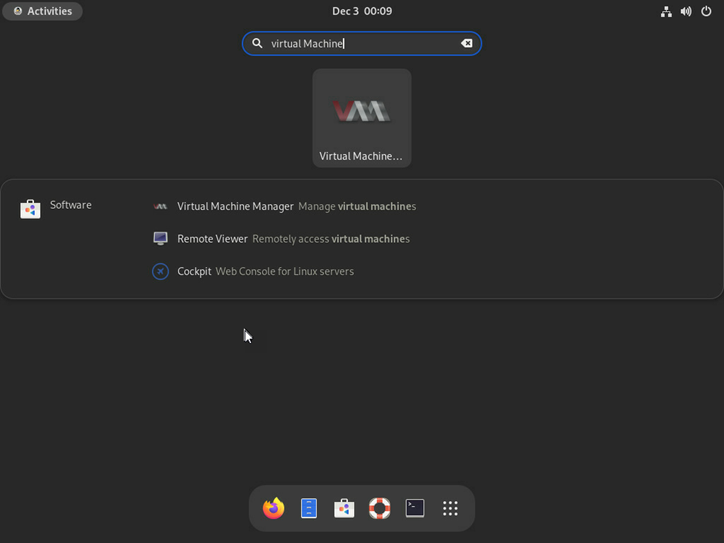
And then you should need a normal GNOME desktop. Log in an d then let’s to start the virt-manager,you can find it by searching for “virtual machine” in the search, and then running the manager.
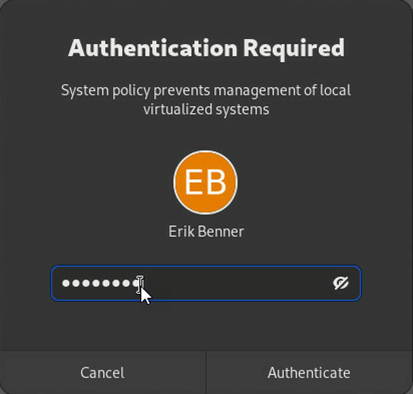
The manager will need you to authenticate if you are not root , so use your password.
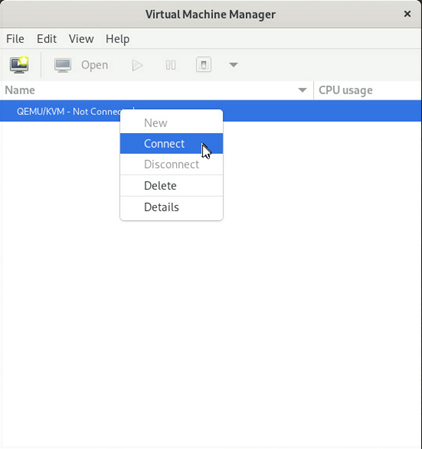
Now you can connect to a KVM host. Normally you will see the localhost, but you can add additional hosts. Right click on the host, and select connect;
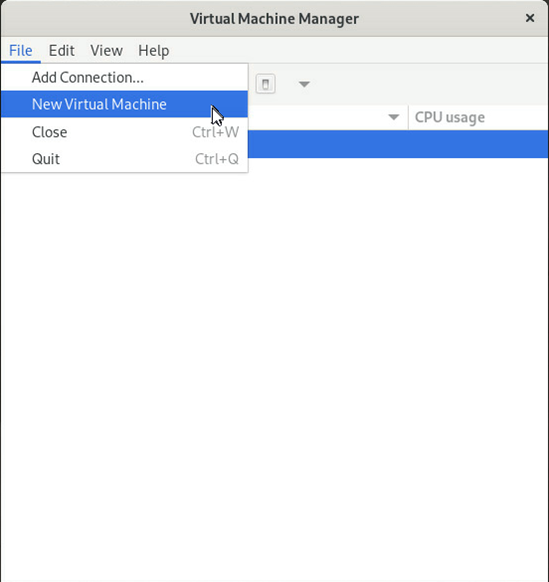
Once connected, you can select file-> new virtual machine
You can also just run virt-install from a shell.
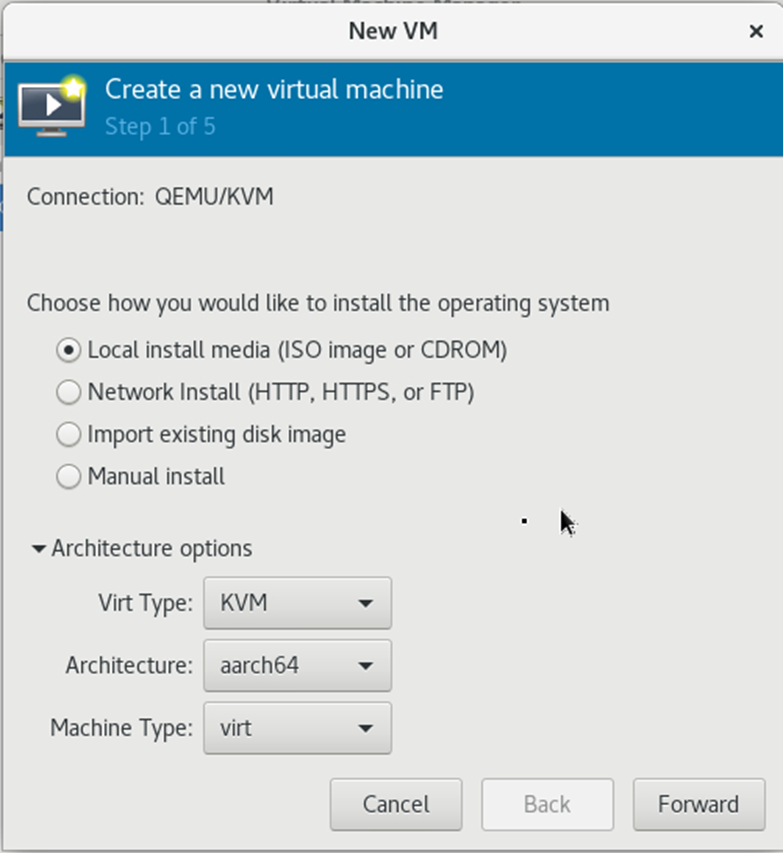
Here you will start the process to create a VM. Doing this on ARM and x86 is identical, with the one difference of using an install ISO that matches your architecture.
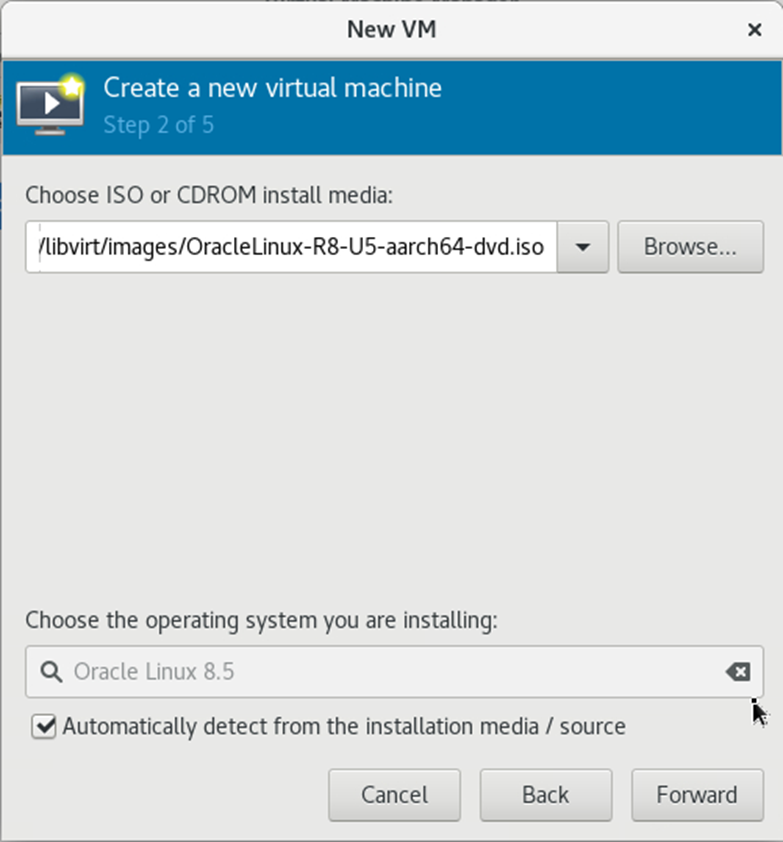
Here, you will pick the media. You can click on the browse button to use the ISO you copied over earlier, or you can browse the system for the appropriate ISO file.
Next, we will assign vcpu and ram to the system. On ARM the vcpu = 1 ARM core, and on x86 each vcpu = 1 thread.

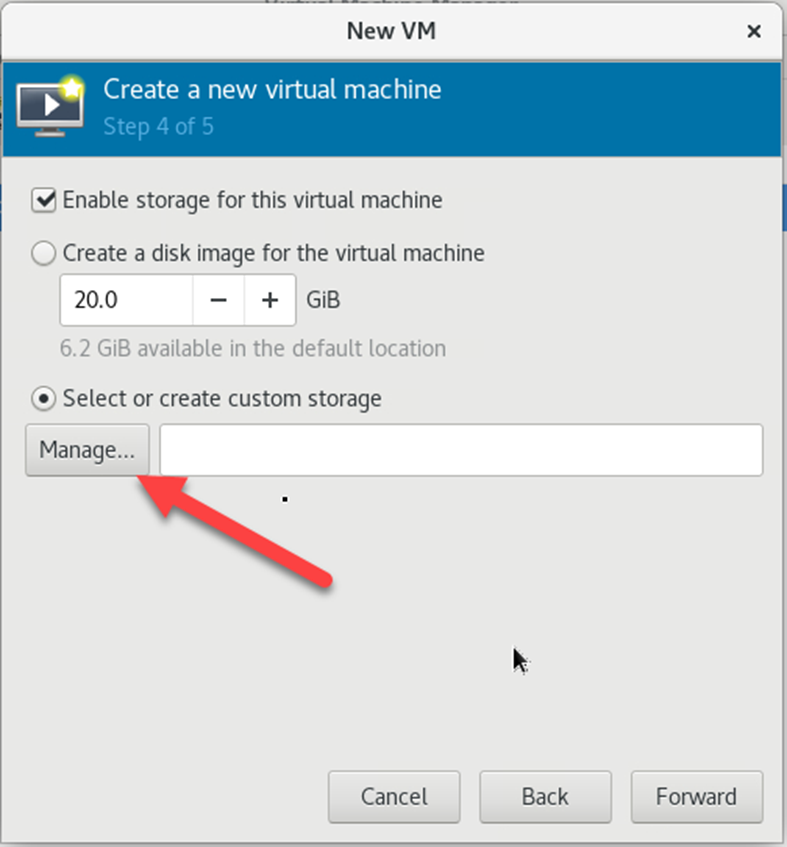
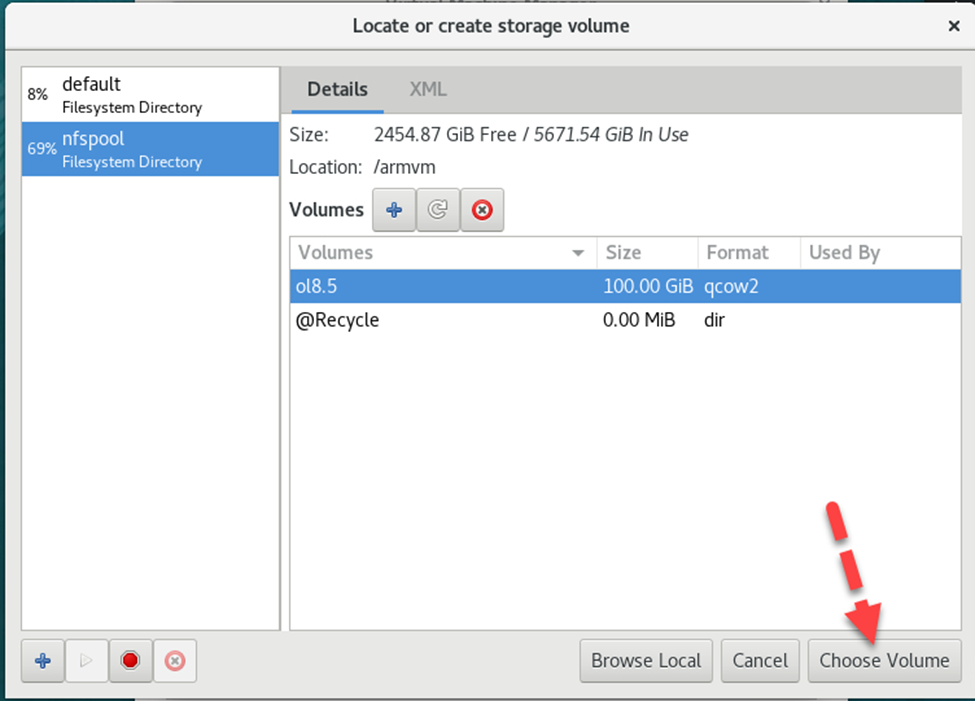
Next we will create storage for the VM. By default new disk files are put into /var/lib/libvirt/images. You can change this by creating a new storage pool. In the following example, I am creating a pool called nfspool and using an NFS mounted filesystem.
To do this, select the custom storage option;
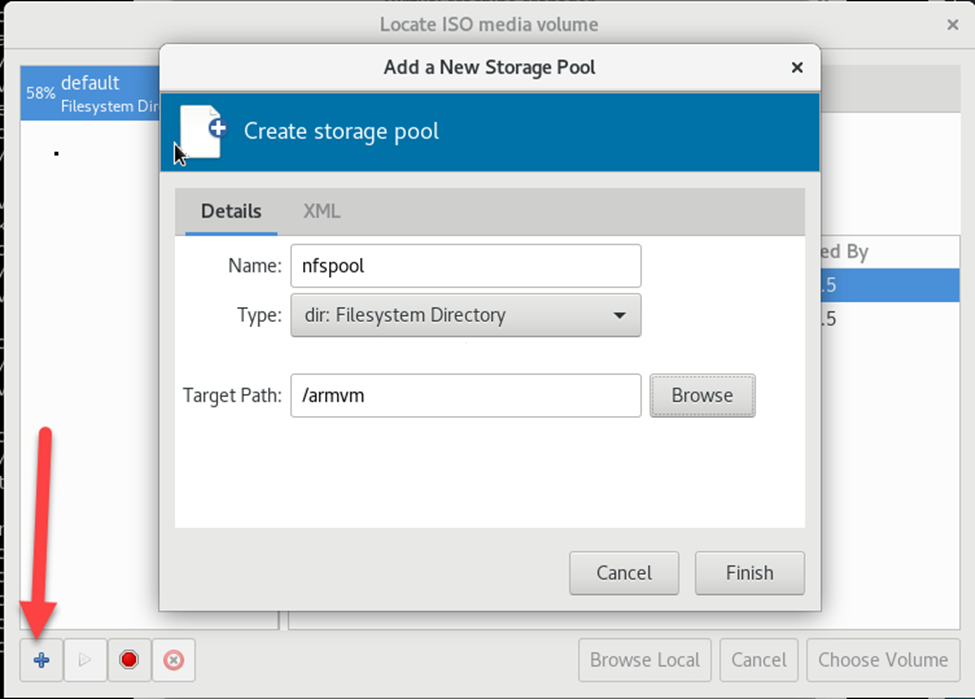
And then we add the new pool. Pools are where storage is hosted, and be a local directory, filesystem gluster filesystem and more!
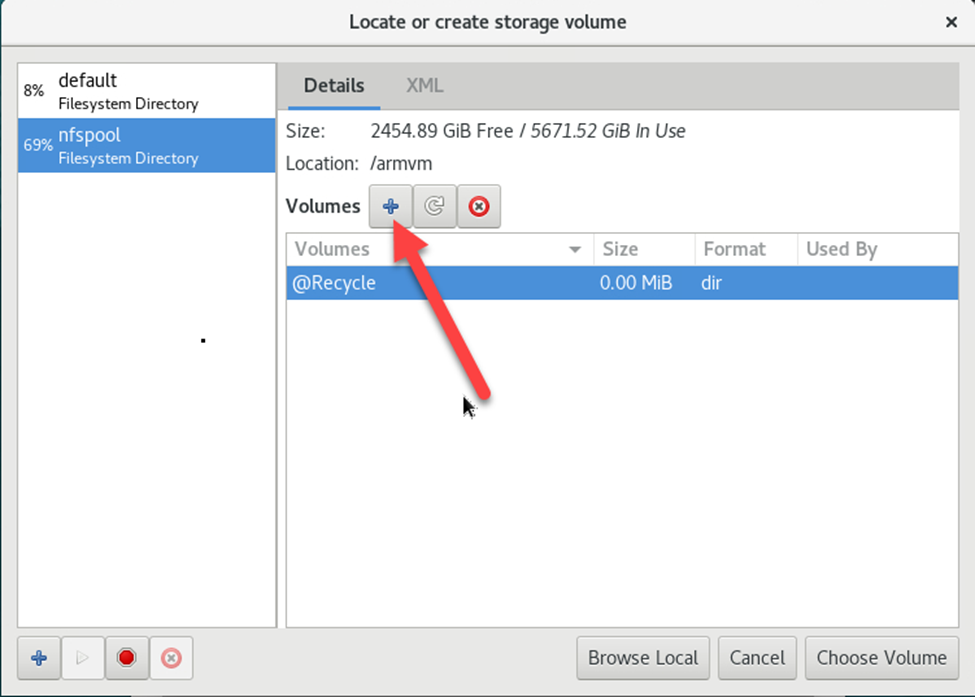
And then create the volume in nfspool..
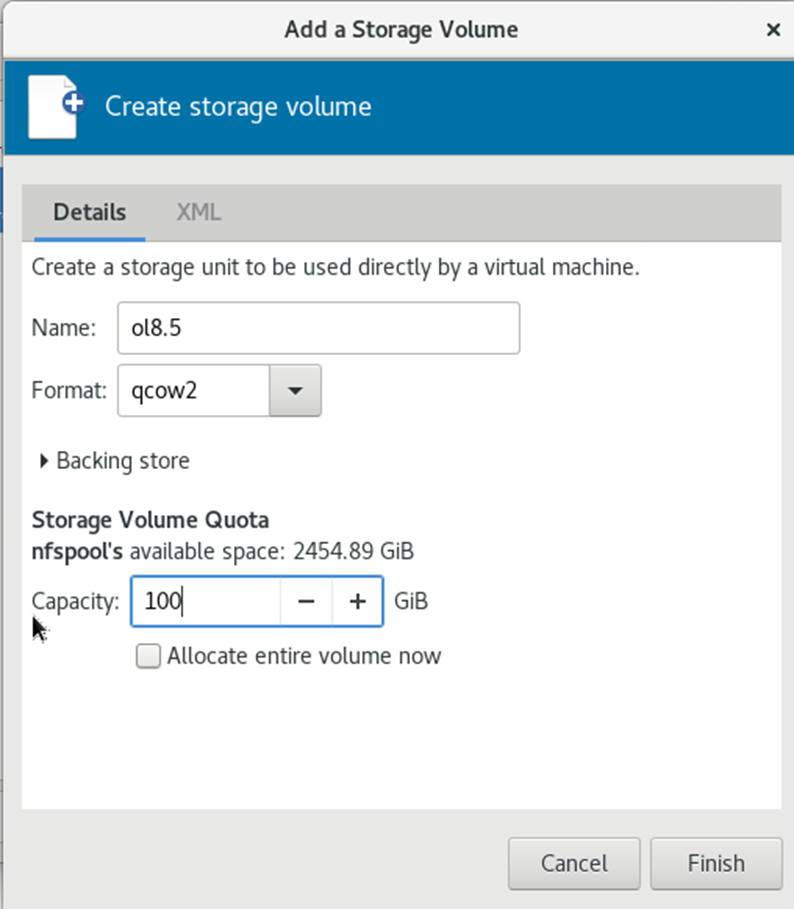
Creating the virtual disk, with 100G. There are several formats, using qcow2 is fine for most users.
Now we see the new disk, and can choose it. Don’t forget to highlight and choose a disk!
Then click on forward , to review the VM and pick the network.
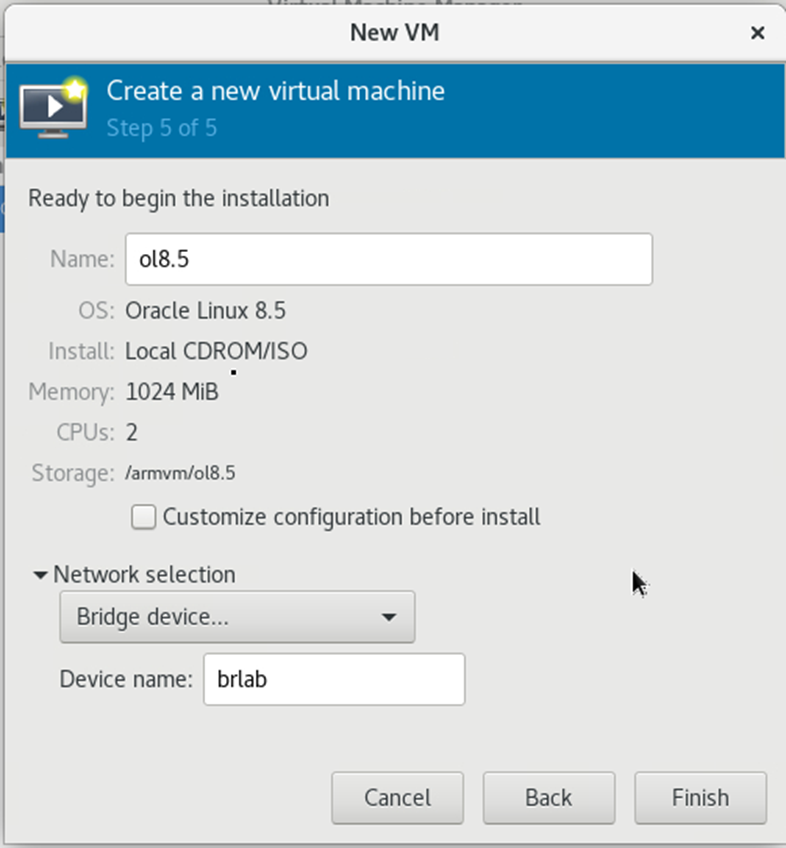
Here we see the brlab bridge we previously created. You can create other bridges and select them as needed.
Finish to finish and boot from the ISO.
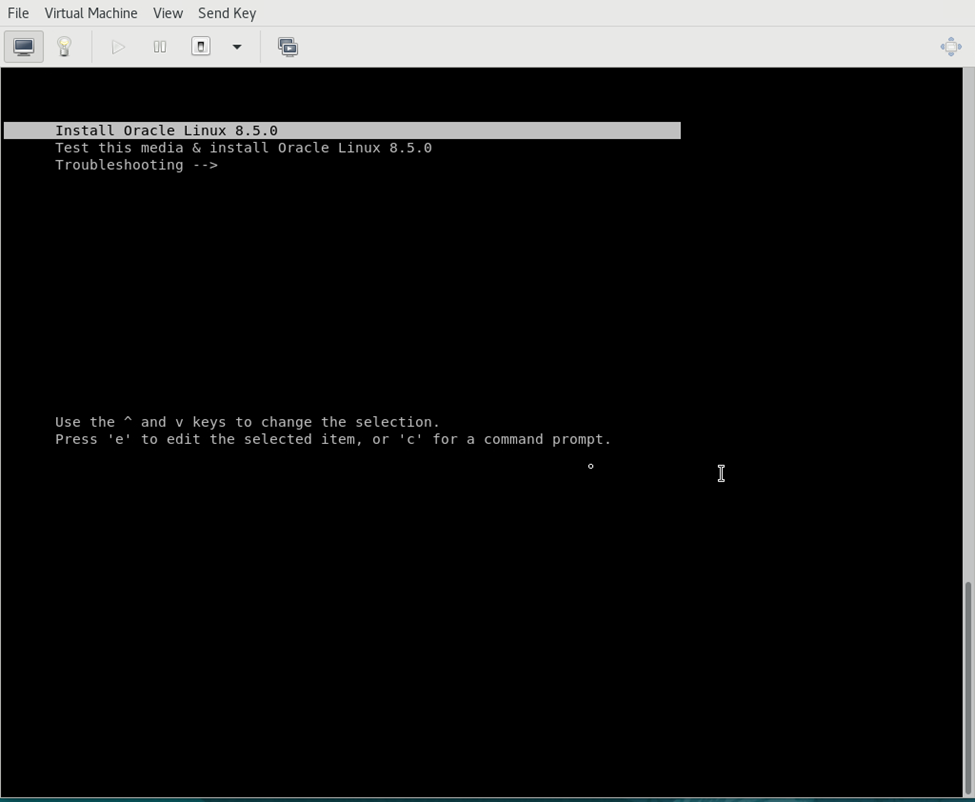
And complete the OS install, just like you would on a baremetal system.